Enroll for Electronic Insurance Services
- Last updated
-
-
Save as PDF
Updated: 03/19/2024 | Views: 13626
Tebra makes it easy to submit claims and other transactions electronically. Once an insurance company is added to your Tebra account, submit enrollment requests for electronic service connections through our Enrollments Setup wizard. Enrollments are completed with the Billing Tax ID and NPI used for submitting claims per the practice's/provider's agreement with the insurance companies.
Even if you've used electronic services in the past, a user with System Administrator, Provider, or Biller permissions must complete the enrollment process in Tebra. Before enrolling for electronic services for Claims, Eligibility, and/or ERAs:
You will always navigate to the Enrollments Dashboard to start an enrollment request, edit, or delete a draft enrollment request.
Access Insurance
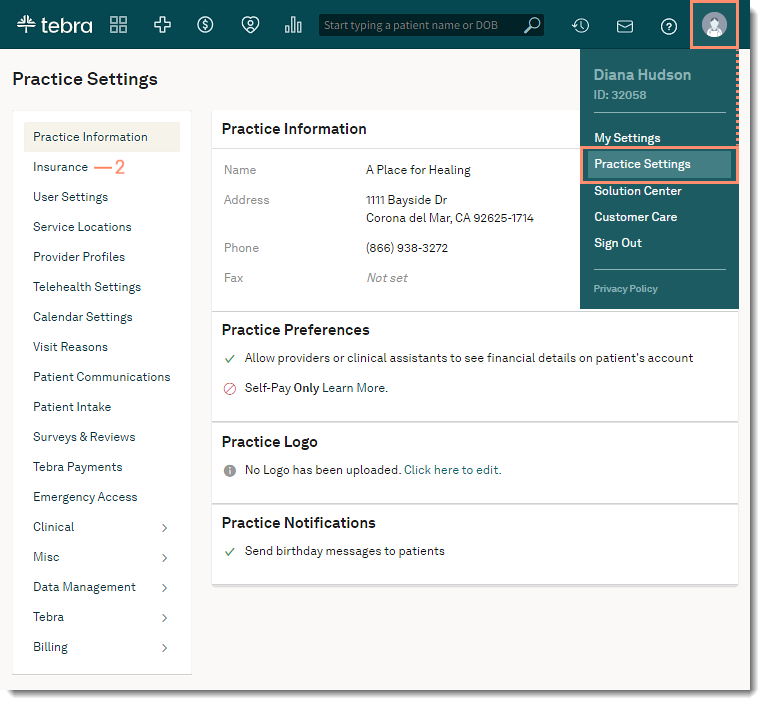
- Hover over the User icon and click on Practice Settings. The Practice Settings page opens.
- Click Insurance. The Insurance Companies dashboard opens.
|
 |
Start Enrollment
- Click ENROLL. The Enrollments Wizard opens.
Note: Once started, the option to Save for Later is available in each step of the wizard. For more detailed explanations of each step, use the FAQ section on the right of the window.
- To Edit and continue, or Delete a previously saved enrollment, click DRAFT ENROLLMENT.
|
 |
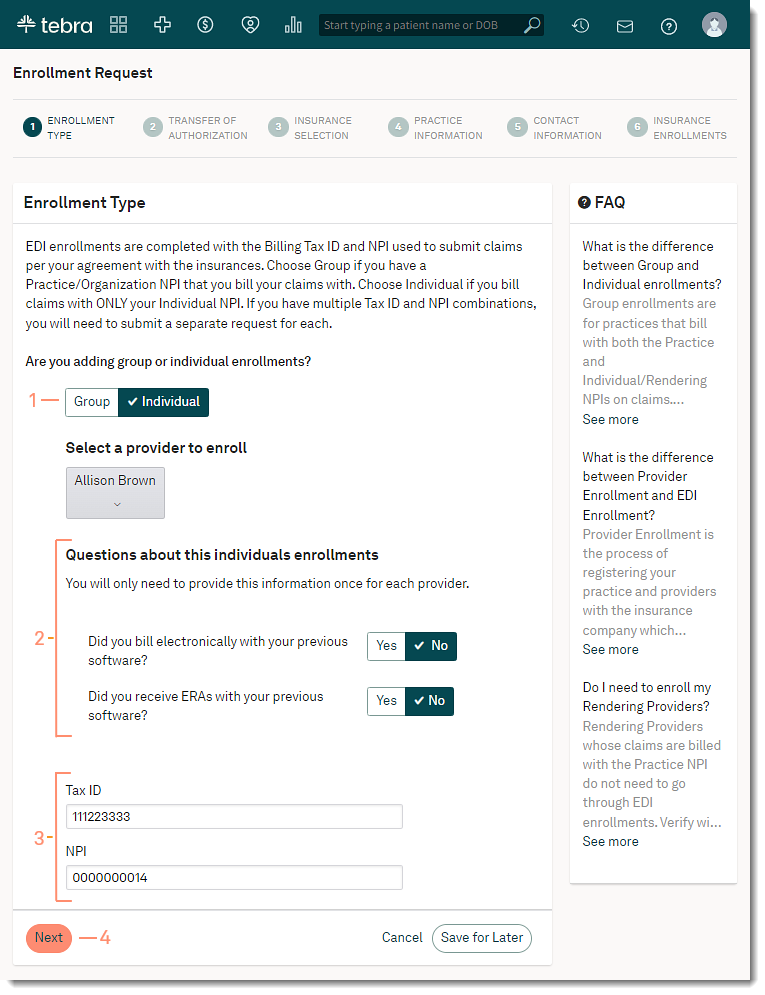
Enrollment Type
- Click to select the type of enrollment:
- Group: Enrolls all providers in the practice for the selected electronic service(s).
- Individual: Enrolls a specific provider for the selected electronic service(s).
- If selected, click the drop-down arrow to Select a provider to enroll.
- Questions about enrollments: These questions only need to be answered once per group and provider. Once answered, the Enrollment questions for this group/provider previously submitted is noted in the Enrollments Setup wizard.
- Click Yes or No to indicate whether or not this group/provider has billed the insurance companies electronically with the previous software.
- Click Yes or No to indicate whether or not this group/provider has received ERAs from the insurance companies with the previous software.
- If Yes is selected in one or both questions, click the drop-down arrow to indicate the clearinghouse used:
- If TriZetto/GatewayEDI, enter the current TriZetto Site ID.
- If Other, enter the name of the primary clearinghouse used with the previous software.
- The Tax ID and NPI auto-populates based on the data entered during the New Practice Setup Wizard.
- Click Next. The Transfer of Authorization page opens.
|
 |
Transfer of Authorization
The Transfer of Authorization Form (TAF) helps expedite the enrollment process by authorizing Tebra to sign insurance company EDI agreements on your behalf. Skipping this step may cause delays in your practice getting paid.
Note: Only one TAF form is required for group enrollments and each provider.
- Click Download & Proceed.
- Save the downloaded TAF .pdf file. The Insurance Selection page opens.
Once the enrollment request is submitted, open the saved .pdf file and follow the instructions to complete and upload the TAF when ready.
|
 |
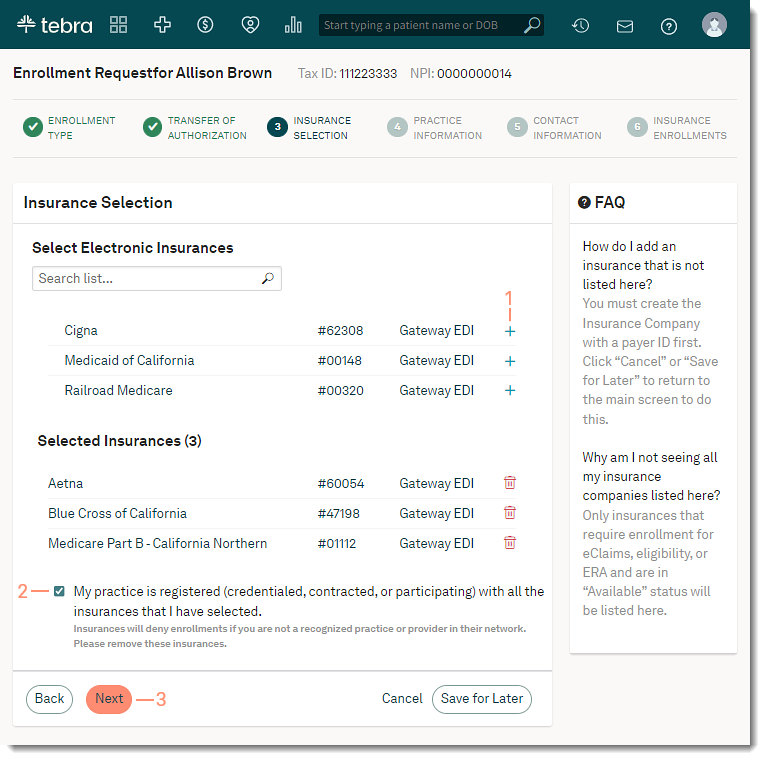
Insurance Selection
- Click + to add it to the Selected Insurances section.
 Tip: When there are numerous insurances listed, use the search box to enter all or part of the insurance company name or payer ID. Tip: When there are numerous insurances listed, use the search box to enter all or part of the insurance company name or payer ID.
Note: Only insurances that require and are ready for electronic services enrollment are listed.
- To remove Selected Insurances, click the trash icon.
- Verify the practice is credentialed, contracted, or participating with all selected insurances then click to acknowledge.
- Click Next. The Practice Information page opens.
|
 |
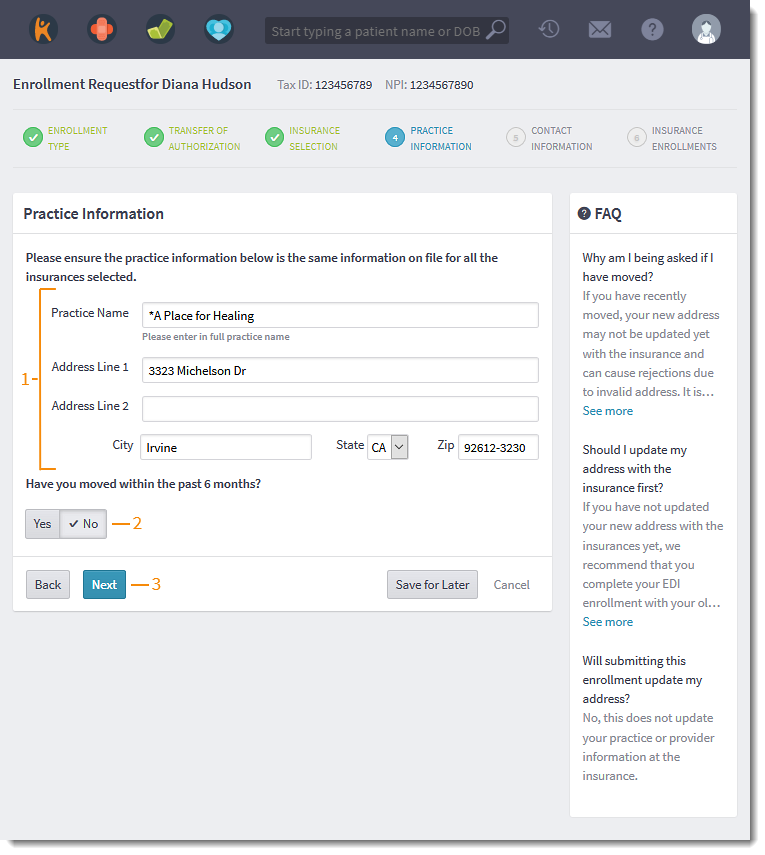
Practice Information
- Verify the Practice Information is current and the same for all selected insurances.
- Click Yes or No to indicate whether or not the practice/provider has moved in the past 6 months.
- If yes, enter the previous address.
- Click Next. The Contact Information page opens.
|
 |
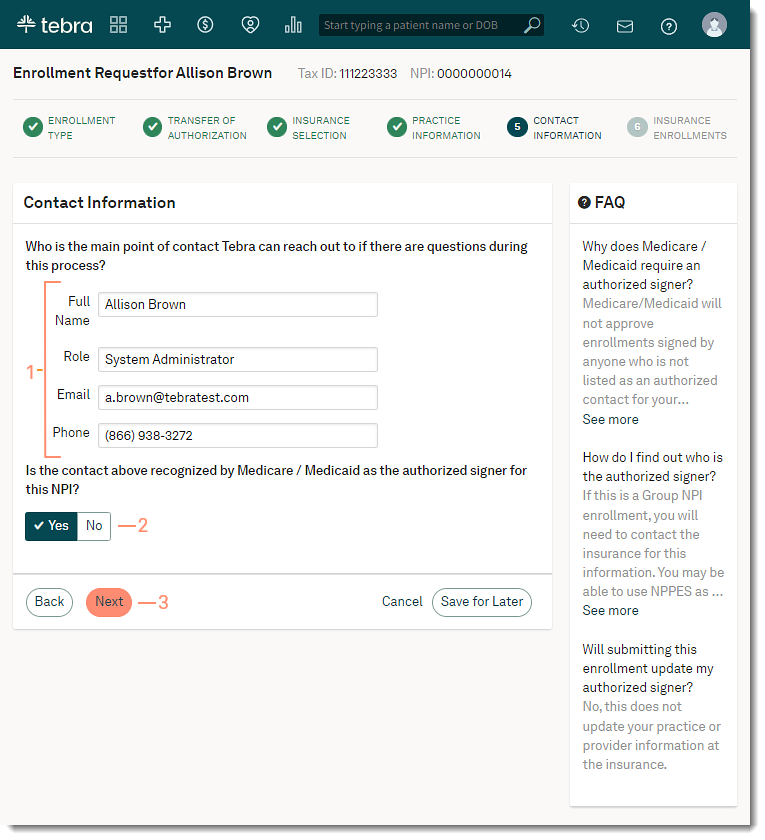
Contact Information
- Verify the practice's main point of contact is up to date. This contact is who Tebra can reach out to if there are any questions during the enrollments process.
- If Medicare / Medicaid was a selected insurance, click Yes or No to indicate whether or not the main point of contact is recognized by Medicare / Medicaid as the authorized signer for this NPI.
- If no, enter the authorized signer's information to be used to populate enrollment forms.
- Click Next. The Electronic Enrollments page opens.
|
 |
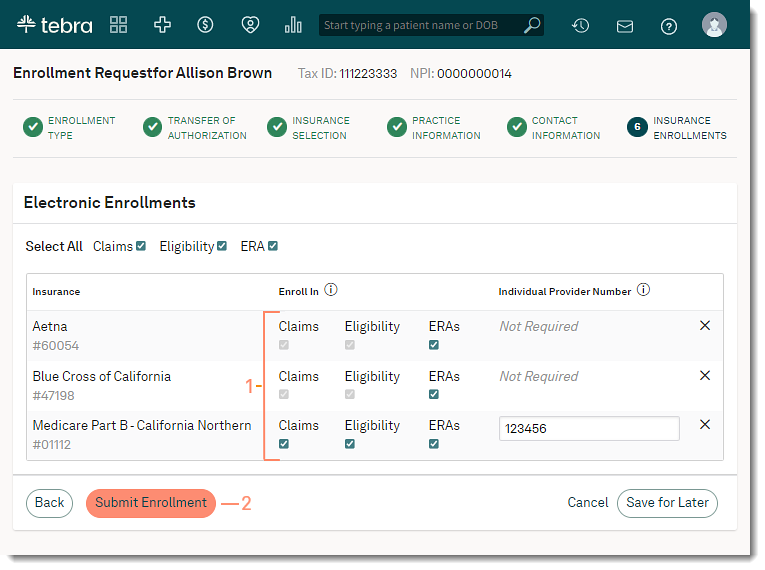
Electronic Insurance Enrollments
- Click to select the available electronic service(s): "Claims", "Eligibility", and/or "ERAs" to enroll in for each insurance.
Tip: To enroll in a service for all insurances listed, use the Select All options.
Note: Pre-selected checkboxes indicate transactions are automatically included without additional enrollment requirements. Some insurance companies may not support all services. If a service is not displayed, it is not available.
- If required for the enrollment, enter additional information (e.g., Provider Number).
- Click Submit Enrollment when finished. The enrollment request is submitted.
Note: An email confirmation is sent to the user that submits the enrollment request.
Statuses for each electronic service displays on the Enrollments Dashboard. To learn more, Review Electronic Service Enrollment Statuses.
|
 |
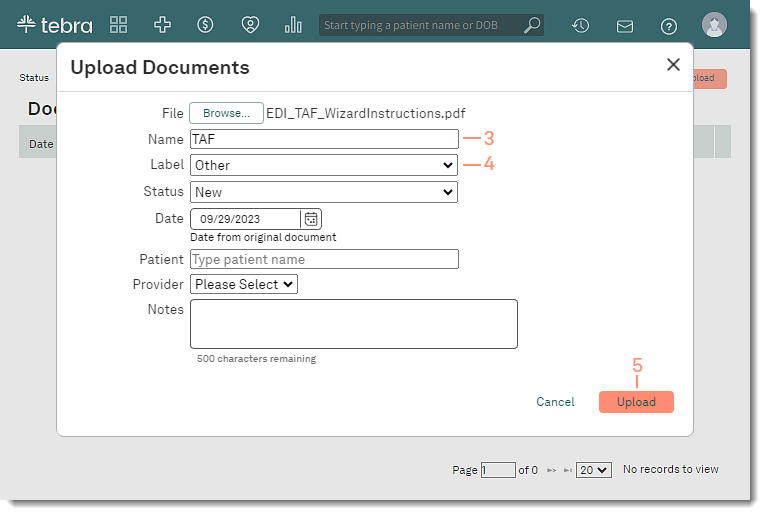
Upload Transfer of Authorization Form (TAF)
If necessary, follow the instructions in the previously downloaded and saved Transfer of Authorization Form (TAF) to complete it. Then, upload the scanned file.
- Hover over the Platform icon and click on Documents. The Documents page opens.
- Click +Upload. The computer's document library opens. Find and select the scanned TAF to attach. The Upload Documents pop-up window opens.
- Enter "TAF" as the Name.
- Click the drop-down arrow and select Other as the Label.
- Click Upload. The document is now ready for the Tebra Enrollments team.
|
 |